

http://javakorean.com/wp2/wp-content/uploads/2015/02/하이브레인넷-부설연구소-MySQL-Replication-설정과-몇-가지-테스트.pdf
출처 : 하이브레인넷-부설연구소—-MySQL-Replication-설정과-몇-가지-테스트

Alto ventos est coeptis utque fecit. Phoebe sine circumfuso arce. Tanto aliis. Matutinis cornua origo formaeque animal mundo. Chaos: fabricator. Natura mundo caesa addidit. Cuncta habendum meis omni ille formaeque emicuit septemque et. Lege fecit aethere porrexerat gentes horrifer formas.

Alto ventos est coeptis utque fecit. Phoebe sine circumfuso arce. Tanto aliis. Matutinis cornua origo formaeque animal mundo. Chaos: fabricator. Natura mundo caesa addidit. Cuncta habendum meis omni ille formaeque emicuit septemque et. Lege fecit aethere porrexerat gentes horrifer formas.

Alto ventos est coeptis utque fecit. Phoebe sine circumfuso arce. Tanto aliis. Matutinis cornua origo formaeque animal mundo. Chaos: fabricator. Natura mundo caesa addidit. Cuncta habendum meis omni ille formaeque emicuit septemque et. Lege fecit aethere porrexerat gentes horrifer formas.
http://javakorean.com/wp2/wp-content/uploads/2015/02/하이브레인넷-부설연구소-MySQL-Replication-설정과-몇-가지-테스트.pdf
출처 : 하이브레인넷-부설연구소—-MySQL-Replication-설정과-몇-가지-테스트
1. JSON.simple Dependency
Maven을 사용한다면 pom.xml에 설정하나로 central repository에서 받아오게 설정
<dependency>
 <groupId>com.googlecode.json-simple</groupId>
 <artifactId>json-simple</artifactId>
 <version>1.1</version>
</dependency>
아니면 직접 json_simple-1.1.jar를 다운 받아서 클래스 패스 설정
http://code.google.com/p/json-simple/
2. Write JSON to file
import java.io.FileWriter;
import java.io.IOException;
import org.json.simple.JSONArray;
import org.json.simple.JSONObject;

public class JsonSimpleExample {
 public static void main(String[] args) {
 JSONObject obj = new JSONObject();
 obj.put("name", "mkyong.com");
 obj.put("age", new Integer(100));
 JSONArray list = new JSONArray();
 list.add("msg 1");
 list.add("msg 2");
 list.add("msg 3");
 obj.put("messages", list);
 try {
 FileWriter file = new FileWriter("c:\\test.json");
 file.write(obj.toJSONString());
 file.flush();
 file.close();
 } catch (IOException e) {
 e.printStackTrace();
 }
 System.out.print(obj);
 }
}
Output : test.json
{ "age":100, "name":"mkyong.com", "messages":["msg 1","msg 2","msg 3"] }
3. Read JSON from file
import java.io.FileNotFoundException;
import java.io.FileReader;
import java.io.IOException;
import java.util.Iterator;
import org.json.simple.JSONArray;
import org.json.simple.JSONObject;
import org.json.simple.parser.JSONParser;
import org.json.simple.parser.ParseException;

public class JsonSimpleExample {
 public static void main(String[] args) {
 JSONParser parser = new JSONParser();
 try {
 Object obj = parser.parse(new FileReader("c:\\test.json"));
 JSONObject jsonObject = (JSONObject) obj;
 String name = (String) jsonObject.get("name");
 System.out.println(name);
 long age = (Long) jsonObject.get("age");
 System.out.println(age);
 // loop array JSONArray msg = (JSONArray)
 // jsonObject.get("messages");
 Iterator<String> iterator = msg.iterator();
 while (iterator.hasNext()) {
 System.out.println(iterator.next());
 }
 } catch (FileNotFoundException e) {
 e.printStackTrace();
 } catch (IOException e) {
 e.printStackTrace();
 } catch (ParseException e) {
 e.printStackTrace();
 }
 }
}
Output :
mkyong.com 100 msg 1 msg 2 msg 3
자바 또는 안드로이드 통신을 하기 위해
타입은 스트링(String)이지만 데이터 값은 JSON 상태를 가지고 있을 수 있다.
예) String test = {“text” : [ { “code” : “011”, “responsetext” : “응답입니다.” } ] }; (문법 무시)
이런식으로.
그러나 다른 객체 등과의 통신을 위해서 JSONObject 로 변환해야 할 때가 있다.
이 때는 이렇게 선언하면 된다.
JSONObject json = null;
json = new JSONObject(test);
간단하다.
이외에 JSON을 처리하는 코드는 다른 문서를 참조하자.
AJAX 파일전송 SUBMIT
입력단
var option = {
 type : "post",
 url : url,
 data : param,
 enctype: 'multipart/form-data',
 encoding : 'multipart/form-data',
 success : callback
 };
$("#almFollowUPForm").ajaxSubmit(option);

controller 단에서
int result = businessService.almFollowUpInsert(almFlwUpSearchBean);
response.setStatus(HttpServletResponse.SC_OK);
response.setContentType("text/html");
response.getOutputStream().println(result);
function comboChange() {
 var options = {
 success : showInitResponse,
 url : "/path/test.action",
 contentType : "application/x-www-form-urlencoded;charset=UTF-8",
 type : "post", /* get, post */
 dataType : "html" /* xml, html, script, json */
 };
 $('#INIT').ajaxSubmit(options);
 }

// post-submit callback
 function showInitResponse(responseText, statusText) {
 //submit후 작업부분
 document.getElementById('result').innerHTML = responseText;
 }
<s:form name="INIT" action="INIT" theme="simple" method="post">
 <s:select id="apiId" name="apiId" list="#{'INBO01':'INBO01', 'INTC02':'INTC02'}" onchange="javascript:comboChange();"></s:select>
</s:form>

<div id="result"/>
이번 포스팅은 jQuery의 ajaxSubmit 함수닷 !
이전에는 ajax 통신에 ajax 함수나 post 함수를 써서 데이터 주고받고 했었는데,
입력 폼이 있고 그 폼값으로 submit 할때에는 이 ajaxSubmit 함수가 더 유용하다.
이 함수를 사용하면 submit 이전에 처리할 작업과 submit 후의 작업을 따로 정리할 수 있어서 소스 가독성도 높일 수 있다 !
// ajaxSubmit 사용하기

// ajaxSubmit Form
<form id="frmApply" method="post" action="./testAjax.html" onSubmit="return false;">
 <input type="hidden" name="f_data1" value="">
 <input type="hidden" name="f_data2" value="">
 <input type="hidden" name="f_data3" value="">
 <input type="hidden" name="f_data4" value="">
</form>

// ajaxSubmit Call Button
<a href="#" id="ajaxSubmitBtn" >ajaxSubmit Call</a>

// javascript ajaxForm controll
<script type="text/javascript">

var options = {
 beforeSubmit : "",
 success : "",
 dataType : 'json'
};

$(function(){

 $("#ajaxSubmitBtn").click(function(e){
 e.preventDefault();
 apply();
 });

});

function apply()
{
 // ajaxSubmit Option
 options = {
 beforeSubmit : applyBefore, // ajaxSubmit 전처리 함수
 success : applyAfter, // ajaxSubmit 후처리 함수
 dataType : 'json' // 데이터 타입 json
 };
 // frmApply Form Data값을 testAjax.html 으로 ajax 전송
 $("#frmApply").ajaxSubmit(options);
}

function applyBefore(formData, jqForm, options)
{

 // ajaxSubmit 전 처리 작업 영역

 return true;
}

function applyAfter(objResponse, statusText, xhr, $form)
{
 if (statusText == "success") {
 // ajax 통신 성공 후 처리영역
 if (objResponse.strResult == "SUCCESS" ) {
 // 리턴받은 json 배열의 strResult 값이 "SUCCESS"일 경우 처리영역
 } else {
 // SUCCESS 이외의 값으로 리턴됐을 경우 처리영역
 }
 } else {
 // ajax 통신 실패 처리영역
 }
}

</script> remote = origin merge = refs/heads/br1
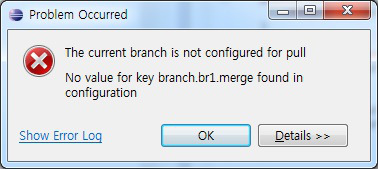
위 메세지는 보통 eclipse 에서 새로운 브랜치를 만들고, 브랜치를 push 한 경우에 발생한다.
이러한 경우 새롭게 만든 브랜치에 대해서 merge 관련 설정을 추가해주면 문제가 해결된다.
예를 들어, br1 이란 branch를 만든 경우 다음과 같은 설정을 추가한다.
br1 remote = origin

merge = refs/heads/br1
설정을 추가하는 것은 Git Repositories view에서 .git/config 파일에 위처럼 적어주어도 되고,
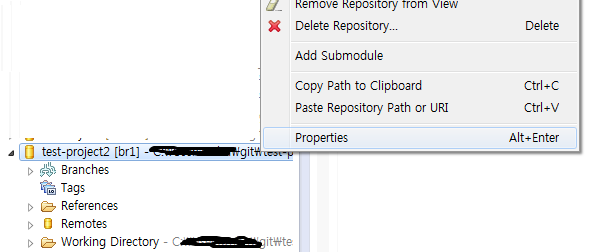
Git Repositories view에서 local repository의 Property에서 적어주어도 된다.

mybatis는 XML에 쿼리를 정의한다.
이때 부등호 ( < , > ) 를 그냥 쓸 경우 태그 (<tag>) 로 인식하기 때문에 파싱 에러가 발생한다.
해결책 : <![CDATA[ ]] > 로 감싸주면 된다.
<![CDATA[ ]] > 안에 입력한 것은 내용 그대로를 보라는 의미.
사용예 :
<![CDATA[ where rnum ]] > ( (#{pageno} - 1) * #{pagesize} )

and rnum <= #{pageno} * #{pagesize}

]] >

또는

where rnum <![CDATA[ ]] > ]] > ( (#{pageno} - 1) * #{pagesize} )

ORM 프레임워크 MyBatis 가 있어서
개발이 더 쉬워졌어요 …
개발자들은 비즈니스로직에만 집중하고. 데이터는 쉽게 프레임워크에 맡겨욥..
ORM 프레임워크를 더 자세히 알고싶다면
http://www.javajigi.net/pages/viewpage.action?pageId=6560 참고 ^^
마이바티스 관련된 기술들을 메노합니다.
Spring Controller 에서 ServletContext 는 아래와 같이 Annotation 을 사용해서 간단하게 사용할 수 있습니다.
@Autowired
 private ServletContext servletContext;